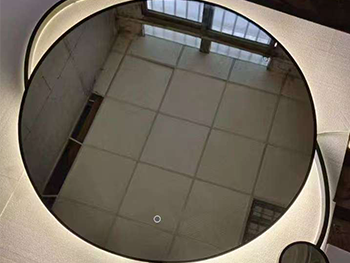
How to Install a Bathroom Smart Mirror Easily: A Complete Guide
A bathroom smart mirror is more than just a reflective surface—it is a high-tech addition to modern bathrooms. Featuring LED lighting, anti-fog systems, touch controls, Bluetooth music, and clock displays, smart mirrors enhance daily routines and elevate the style of your bathroom.
Proper installation is crucial for safety, optimal performance, and durability. This guide explains how to install a bathroom smart mirror easily, along with information on maintenance, warranty, energy standards, and structural specifications. Whether you are a homeowner or a professional installer, this guide provides step-by-step insights to make the process seamless.
Before starting, gather the necessary tools:
Power drill and appropriate drill bits
Wall anchors and screws (usually included with the mirror)
Screwdriver set
Measuring tape and level
Pencil or marking tool
Safety gloves and goggles
Electrical tester (for wired mirrors)
Optional items:
Stud finder for drywall installation
Silicone sealant (for embedded mirrors)
Smart mirrors are typically wall-mounted or embedded, depending on your bathroom design.
Select a spot near a power outlet for LED lighting and other electronic functions.
Avoid placing the mirror in areas where it will be directly exposed to water splashes.
Ensure there is enough clearance for mounting and daily usage.
Use the included template or measure the mirror dimensions.
Mark positions for screws and brackets, ensuring the mirror will be level.
Double-check measurements to avoid misalignment.
Drill holes according to the markings.
Insert wall anchors if needed (especially for drywall or hollow walls).
Attach the mounting brackets securely.
Carefully lift the mirror and place it on the brackets.
Secure with screws or locking mechanisms as per manufacturer instructions.
Check that the mirror is level and firmly attached.
Plug the mirror into a nearby outlet or connect hardwiring if required.
For embedded mirrors, consider hiring a certified electrician to ensure safety.
Turn on LED lighting and adjust brightness.
Activate anti-fog function to ensure proper operation.
Test Bluetooth music, touch controls, and any additional features.
Always follow the manufacturer’s instruction manual.
Use protective gloves to prevent glass damage or injury.
Test anti-fog and lighting functions before finalizing mounting.

Smart mirrors integrate modern technology and durable construction. Understanding their structure helps during installation and maintenance.
| Component | Description |
|---|---|
| Glass Panel | High-quality tempered glass for durability and clarity |
| LED Lighting | Embedded LED strips or backlit panels for even illumination |
| Anti-Fog System | Heating film or panel that prevents condensation |
| Control Unit | Circuit board for LED, touch, and Bluetooth functions |
| Frame / Mounting Bracket | Wall-mounted or embedded support structure |
| Protective Coating | Anti-scratch, waterproof, or anti-glare layers |
Knowing these components allows installers to handle mirrors carefully and ensures the proper connection of electrical and smart features.
Proper maintenance ensures longevity and optimal performance of your smart mirror.
Wipe glass surface with a soft microfiber cloth.
Avoid harsh chemicals or abrasive pads.
Clean the frame and check for dust accumulation around LED panels.
Inspect mounting brackets and wall anchors for any looseness.
Test anti-fog functionality and ensure heating elements are working.
Check touch and Bluetooth features for responsiveness.
Inspect internal components if accessible (only by qualified technicians).
Confirm energy consumption and efficiency standards are met.
Most smart bathroom mirrors come with warranties ranging from 1–3 years, covering manufacturing defects and electrical malfunctions. Key points to consider:
Covered Components: LED lights, anti-fog system, touchscreen controls, Bluetooth modules.
Exclusions: Physical damage, water intrusion from improper installation, or misuse.
Extended Warranty Options: Some manufacturers offer extended support for an additional fee.
Claim Process: Retain proof of purchase and follow the manufacturer’s service procedure.
Tip: Always verify warranty terms before purchasing, especially for B2B projects or commercial installations.
LED smart mirrors are designed to consume less electricity while providing superior illumination. Key standards and features include:
| Feature | Benefit |
|---|---|
| Energy-Efficient LED Panels | Lower electricity consumption compared to traditional bulbs |
| Auto-Off Function | Saves energy when the mirror is not in use |
| Adjustable Brightness | Reduces unnecessary power usage |
| Compliance Certifications | CE, RoHS, or UL ensure safe and eco-friendly design |
Selecting mirrors that meet these energy standards ensures long-term cost savings and compliance with environmental regulations.
Even with proper installation, minor issues may occur:
LED Not Turning On: Check power connection and circuit board functionality.
Anti-Fog Not Working: Ensure the mirror is plugged in, and check heating element integrity.
Bluetooth Connectivity Issues: Reset the pairing and verify device compatibility.
Loose Mirror: Recheck mounting brackets and wall anchors.
Pro Tip: Always follow the manufacturer’s troubleshooting guide and avoid DIY fixes that could void warranties.
Installing a bathroom smart mirror can be simple and straightforward with the right tools, preparation, and knowledge. By following this guide:
Choose the optimal location
Install securely with proper tools
Understand structural components
Maintain regular care and inspections
Comply with energy and safety standards
You can enjoy the full functionality, elegance, and convenience of modern smart mirrors, including LED lighting, anti-fog systems, touch controls, and integrated smart features.
With proper installation and maintenance, a smart bathroom mirror can enhance your bathroom design, improve daily routines, and provide years of reliable service.
This website uses cookies to ensure you get the best experience on our website.
Comment
(0)